Passing Variable arguments in functions

Sometimes it becomes necessary to have variable number of arguments in the function. One way is to overload the function but that may be unnecessary for simple logic. We can use access variable-argument lists macros in the functions. Here is a simple example:


//Program tested on Microsoft Visual Studio 2008 - Zahid Ghadialy
//Program to show how to use variable number of arguments

#include<iostream>
#include <stdarg.h> //needed for va_ macros
using namespace std;

//List Should be terminated by -1 in our case
int Add(int a,...)
{

int
total = a;
int
l_ParamVal=0;

//Declare a va_list macro and initialize it with va_start
va_list l_Arg;
va_start(l_Arg,a);

while
((l_ParamVal = va_arg(l_Arg,int)) != -1)
{

total+= l_ParamVal;
}


va_end(l_Arg);
return
total;
}


int
main()
{

cout<<"Result of Add(2) = "<<Add(2, -1)<<endl;
cout<<"Result of Add(2, 3) = "<<Add(2, 3, -1)<<endl;
cout<<"Result of Add(2, 3, 31) = "<<Add(2, 3, 31, -1)<<endl;
cout<<"Result of Add(2, 3, 31, 77) = "<<Add(2, 3, 31, 77, -1)<<endl;

cout<<endl;
return
0;
}

These type of functions that take variable number of arguments are also referred to as 'Variadic Functions'. See more details here.

The output is as follows:

BASIC, Lasers, and you

Here's an interesting example of the perfect use for BASIC. If you're into laser tag and programming this may be your ticket. It's cool that the makers of this device decided to write the config tool in Liberty BASIC, and that they make the code available so the average Joe can customize it. That's in the spirit of BASIC. Programming for the non-programmer.

http://www.lasertagparts.com/mtmicro.htm

Reinforcement Learning

Reinforcement Learning (RL) is a type of Machine Learning other than "supervised learning" (having a teaching phase that shows the learning between inputs and correct answers) and "unsupervised learning" (discovering clusters and outliers from a set of input samples).

In RL, consider there exist a set of "states" (from the environment) where the agent is going to make some decision of which actions to take and this action will cause it to transfer to a different state. A reward is assigned to the agent after this state transition. During the RL process, the agent's goal is to go through a trial and error process to learn what would be the optimal decision at each state such that the reward is maximized.

The hard part of RL is to know which action has a long term effect on the final outcome. For example, a wrong decision may not have an immediate bad result and therefore may be hidden. RL is about how to assign blames to previous decisions when a bad outcome has been detected.

Basic Iteration Approach
There is a reward matrix, each row represents the from-state and each column represent the to-state. The cell (i, j) represent the "immediate reward" obtained when moving from state i to state j.

The goal is to find an optimal policy which recommends the action that should be taken at each state in order to maximize the sum of reward.

We can use a value vector of each element (i) to represent agent's perception of the overall gained reward if he is at state (i). At the beginning, the value vector is set with random value. We use the following iterative approach to modify the value vector until it converges.

def learn_value_vector
current_state = initial_state
set value_vector to all zeros
repeat until value_vector.converges
# Need to enumerate all reachable next states
for each state(j) reachable by current state(i)
Take action to reach next state(j)
Collect reward(i, j)
action_value(j) =
reward(i, j) + discount * value_vector(j)
end
# Since you will always take the path of max overall reward
value_vector(i) = max_over_j(action_value(j))
current_state = state(maxj)
end
end
After we figure out this value vector, deriving the policy is straightforward. We just need to look across all the value of subsequent next states and pick the one with the highest value.

def learn_policy1
for each state(i)
best_transition = nil
max_value = 0
for each state(j) reachable from state(i)
if value(j) > max_value
best_transition = j
max_value = value(j)
end
end
policy(i) = best_transition
end
end

One problem of this approach is requiring us to try out all possible actions and evaluate all the rewards to the next state. So there is an improve iterative approach described below.

Q-Learning
In Q-Learning, we use a Q Matrix instead of the value vector. Instead of estimating the value of each state, we estimate the value of each transition from the current state. In other words, we associate the value with the pair instead of just .

Therefore, the cell(i, j) of the Q matrix represents the agent's perceived value of the transition from state(i) to state(j). We use the following iterative approach to modify the value vector until it converges.

def learn_q_matrix
current_state = initial_state
set Q matrix to all zeros
repeat until Q matrix converges
select the next state(j) randomly
collect reward (i, j)
value(j) = max Q(j, k) across k
Q(i, j) = reward(i, j) + discount * value(j)
end
end
After figuring out the Q matrix, the policy at state (i) is simply by picking state(j) which has the max Q(i, j) value.

def learn_policy2
for each state(i)
best_transition = nil
max_value = 0
for each state(j) reachable from state(i)
if Q(i,j) > max_value
best_transition = j
max_value = Q(i,j)
end
end
policy(i) = best_transition
end
end

The relationship between the action (what the agent do) and the state transition (what is the new state end up) doesn't necessary be deterministic. In real life, the action and its effect is usually probabilistic rather than deterministic. (e.g. if you leave your house early, you are more likely to reach your office earlier, but it is not guaranteed). Imagine of a probabilistic state transition diagram, where each action has multiple branches leading to each possible next state with a probability assigned to each branch. Making decisions in this model is called the Marchov Decision Process.

The Q-learning approach described above is also good for Marchov Decision Process.

For some good articles in RL,
Reinforcement Learning: A tutorial
Q-learning by examples


Passing unnamed arguments in functions

It is possible to pass an unnamed argument in C++ function. The unnamed argument indicates that argument is unused. Typically unnamed arguments arise from the simplification of code or from planning ahead for extensions. In either case, leaving the argument in place, although unused, ensures that the callers are not affected by the change. Simple example as follows:


//Program tested on Microsoft Visual Studio 2008 - Zahid Ghadialy
//Simple example of unnamed arguments
#include<iostream>

using namespace
std;

void
someFunc(int a, int)
{

cout<<"Only a is defined to "<<a<<endl;
cout<<"The second argument is dummy"<<endl;
}


int
main()
{

someFunc(15, 100); //100 is dummy

cout<<endl;
return
0;
}


The output is as follows:

Converting Decimal Integer to Hexadecimal String using C++

I often encounter situations where I want to convert an Integer value to a Hexadecimal value. Now if it was just for storing, it doesnt really matter as internally decimal and hex values are the same. If it was just printing, its again very straightforward. But the problem I have is to convert it into string value (or chars[]) and use them later. I found a simple program to do this. Here it is:


//Program tested on Microsoft Visual Studio 2008 - Zahid Ghadialy
//Example of program that does int to hex string
//Adapted from http://www.dreamincode.net/forums/showtopic19694.htm
#include<iostream>
#include <stack>

using namespace
std;

string int2hex(unsigned int dec)
{

int
i = 0;
stack <int>remainder;
string hex, temp;
char
hexDigits[] = { "0123456789abcdef" };

if
(dec == 0)
hex = hexDigits[0];

while
(dec != 0)
{

remainder.push(dec % 16);
dec /= 16;
++
i;
}


while
(i != 0)
{

if
(remainder.top() > 15)
{

temp = int2hex(remainder.top());
hex += temp;
}

hex.push_back(hexDigits[remainder.top()]);
remainder.pop();
--
i;
}

return
hex;
}


int
main()
{

unsigned int
dec = 4294967295;
string hex = int2hex(dec);
cout<<"dec = "<<dec<<" and hex = "<<hex.c_str()<<endl;
dec = 123456789;
hex = int2hex(dec);
cout<<"dec = "<<dec<<" and hex = "<<hex.c_str()<<endl;
dec = 100;
hex = int2hex(dec);
cout<<"dec = "<<dec<<" and hex = "<<hex.c_str()<<endl;
dec = 15;
hex = int2hex(dec);
cout<<"dec = "<<dec<<" and hex = "<<hex.c_str()<<endl;
dec = 0;
hex = int2hex(dec);
cout<<"dec = "<<dec<<" and hex = "<<hex.c_str()<<endl;
cout<<endl;
return
0;
}


The output is as follows:

The using and namespace keyword in C++

The using and namespace keyword in C++

Using the using keyword

You may feel it is inconvenient to write std:: in front of cout and endl every time. There is two solution provided by ANSI standard. It is done by use of the keyword using. The first solution is by calling specific standard library explicitly. For example, if we want to use cout and endl which is a part of standard library, we have to call standard library for cout and endl before using them. The following program demonstrates the first solution.

A C++ Program example that calls specific standard library.


#include <iostream>

int main ()
{

    using std::cout;
    using std::endl;

    cout << "Lets have a look on cout !!" << endl;
    cout << "The number 99 : " << 99 << endl;
    cout << "The sum of of 9 + 8 : "<< 9 + 8 << endl;
    cout << "The division of 7 / 18: "<< float (7 / 18) << endl;
    cout << "The multiplication of 6000 & 6000 : "
            << double (6000 * 6000) << endl;
    cout << "Replace Mohammed Homam with your name ..." << endl;
    cout << "Mohammed Homam is a C++ programmer" << endl;

    return 0;
}


Using the namespace keyword

The second solution to avoid the inconvenience of writing std:: in front of cout and endl is by calling the entire standard namespace. It means that you don't have to call any standard library function explicitly. All standard library functions will be called by single statement. The following program demonstrates the second solution.

A C++ Program example that calls entire standard library.


#include <iostream>

int main()
{

    using namespace std;

    cout << "Lets have a look on cout !!" << endl;
    cout << "The number 99 : " << 99 << endl;
    cout << "The sum of of 9 + 8 : " << 9 + 8 << endl;
    cout << "The division of 7 / 18: "<< float (7 / 18) << endl;
    cout << "The multiplication of 6000 & 6000 : "
            << double (6000 * 6000) << endl;
    cout << "Replace Mohammed Homam with your name..." << endl;
    cout << "Mohammed Homam is a C++ programmer" << endl;

    return 0;
}

Fractals in a page of code

What's great about BASIC and languages like it is that you don't have a write a lot of code that has nothing to do with what you're trying to create (like Java for example). It should be really easy to throw together a little code and play with graphics. Programming should be fun, not a burden.

Here is a thread that shows how to draw fractals in less than a page of BASIC.

Click to read the thread

B.E / B.TECH Result May 2009 MDU

Converting normal string/char to wide string/char and vice versa

When you are playing with wide charachters in C++, you sometimes need to covert it into normal charachters and vice versa. Here is a simple program that I picked up from somewhere but cant remember.


//Program tested on Microsoft Visual Studio 2008 - Zahid Ghadialy
//Program to convert from Wide to Narrow strings and Vice Versa
#include<iostream>
#include <sstream>

using namespace
std;

wstring widen( const string& str)
{

wostringstream wstm ;
const
ctype<wchar_t>& ctfacet = use_facet< ctype<wchar_t> >( wstm.getloc() ) ;
for
( size_t i=0 ; i<str.size() ; ++i )
wstm << ctfacet.widen( str[i] ) ;
return
wstm.str() ;
}


string narrow( const wstring& str )
{

ostringstream stm ;
const
ctype<char>& ctfacet = use_facet< ctype<char> >( stm.getloc() ) ;
for
( size_t i=0 ; i<str.size() ; ++i )
stm << ctfacet.narrow( str[i], 0 ) ;
return
stm.str() ;}

int
main()
{
{

const
wchar_t* wcstr = L"asdfg12345" ;
string cstr = narrow(wcstr);
cout <<"\nOutput from wide to narrow = "<< cstr.c_str() << endl ;
}
{

const
char* cstr = "zxcvb67890" ;
wstring wcstr = widen(cstr);
wcout << L"\nOutput from narrow to wide = "<<wcstr.c_str() << endl ;
}

return
0;
}


The output is as follows:


A Simple Pong Game using JavaScript

Pong Game in JavaScript Screenshot


Having the knowledge of moving images using JavaScript, we’ll be creating a small Ping Pong game as an example for this post.


Today we’ll learn to do a few new things in JavaScript:


1. Executing some code every specified time interval (for game loop).

2. Tracking and using mouse movements.

3. Attaching code (function) to events.


Game Theory


As you should be knowing, in this game there is one ball and two paddles at two ends. One is user-controlled the other, for this example, is CPU controlled. User has to move the paddle in order not to let the ball pass through, CPU also has to do the same thing. Whoever’s side the ball passes through looses the game.


There are a few objects which can interact with each other, these are ball, paddles, walls. Let’s see the various interactions that can take place between these:


  1. Ball Hitting Upper/Lower Wall – Ball will bounce off.


  2. Ball Passing Through Either Side – Player or CPU, depending on whose side ball passed through, will loose the game.


  3. Ball Hitting Paddle – It’ll bounce off


We’ll need to take care of these events:


  1. Page Load – Game objects will be initialized


  2. Game Start – Mouse click on the player paddle will start the game.


  3. Mouse Movements – Inside the game area (a div), the paddle will follow the y-position of the mouse. Paddle however should not get past the boundaries.


  4. CPU Paddle – The paddle will follow the ball by moving up/down depending the relative position of the ball. We’ve added a little intelligence by only moving the paddle while ball is coming towards it. This will make the movement as well as the game look more real.


Code


NOTE: Put two files ball_small.png, paddle.png (Right-Click "Save As") in the same directory the script is in.


<!DOCTYPE html PUBLIC "-//W3C//DTD XHTML 1.0 Transitional//EN" "http://www.w3.org/TR/xhtml1/DTD/xhtml1-transitional.dtd">

<html xmlns="http://www.w3.org/1999/xhtml">
<head>
<meta http-equiv="Content-Type" content="text/html; charset=utf-8" />
<title>Pong Game In JavaScript</title>

<style>
#box
{
width: 500px;
height: 300px;
margin: auto;
border: 5px solid #ccc;
position: relative;
overflow: hidden;
}

.ob
{
position: absolute;
border: 0px;
}
</style>
<script type="application/javascript">

// CHANGE THESE, IF REQUIRED
var Speed = 5; // Speed of ball (pixels/step)
var CPUSpeed = 5; // Speed of CPU Paddle (pixels/step)

// Short references to objects
var paddle1;
var paddle2;
var ball;
var box;
var msg;


// For internal use
var dx, dy; // Speed in x and y directions
var ballX, ballY; // x and y positions of ball
var playerY; // y position of player paddle (x fixed)

var cpuY; // y position of CPU paddle (x fixed)
var iID; // To store ID of set interval used to clear it when required

// Attach a function to onLoad event
window.onload = Init;

// INITIALIZE GAME OBJECTS
function Init()
{
// Make short refrences to objects

paddle1 = document.getElementById('paddle1');
paddle2 = document.getElementById('paddle2');
ball = document.getElementById('ball');
box = document.getElementById('box');
msg = document.getElementById('msg');

// Initial values
ballX = (box.offsetWidth / 2) - (ball.offsetWidth / 2);
ballY = (box.offsetHeight / 2) - (ball.offsetHeight / 2);
cpuY = (box.offsetHeight / 2) - (paddle2.offsetHeight / 2);
playerY = (box.offsetHeight / 2) - (paddle1.offsetHeight / 2);
dx = dy = Speed;

paddle1.style.left = 20 + 'px';
paddle1.style.top = playerY + 'px';
paddle2.style.left = box.offsetWidth - (20 + paddle2.offsetWidth) + 'px';
paddle2.style.top = cpuY + 'px';
ball.style.left = ballX + 'px';
ball.style.top = ballY + 'px';

// Show message

msg.innerHTML = '<h2>Click on Paddle to Start Game.</h2>';
}

// START GAME
function Start()
{
// Attach a function to onmousemove event of the box
box.onmousemove = MovePaddle;
// Call 'GameLoop()' function every 10 milliseconds

iID = setInterval('GameLoop()', 10);

msg.innerHTML = '';
}

// MAIN GAME LOOP, CALLED REPEATEDLY
function GameLoop()
{
// MOVE BALL
ballX += dx;
ballY += dy;

// See if ball is past player paddle

if(ballX < 0)
{
clearInterval(iID);
Init();

box.onmousemove = '';

msg.innerHTML = '<h2>You Loose!<br/>Click on Paddle to Re-Start Game.</h2>';
}

// See if ball is past CPU paddle

if((ballX + ball.offsetWidth) > box.offsetWidth)
{
clearInterval(iID);
Init();

box.onmousemove = '';

msg.innerHTML = '<h2>You Win!<br/>Click on Paddle to Re-Start Game.</h2>';
}

// COLLISION DETECTION

// If ball hits upper or lower wall
if(ballY < 0 || ((ballY + ball.offsetHeight) > box.offsetHeight))
dy = -dy; // Make x direction opposite

// If ball hits player paddle

if(ballX < (paddle1.offsetLeft + paddle1.offsetWidth))
if(((ballY + ball.offsetHeight) > playerY) && ballY < (playerY + paddle1.offsetHeight))
dx = -dx;

// If ball hits CPU paddle
if((ballX + ball.offsetWidth) > paddle2.offsetLeft)
if(((ballY + ball.offsetHeight) > cpuY) && ballY < (cpuY + paddle2.offsetHeight))
dx = -dx;

// Place ball at calculated positions

ball.style.left = ballX + 'px';
ball.style.top = ballY + 'px';

// MOVE CPU PADDLE
// Move paddle only if ball is coming towards the CPU paddle
if(dx > 0)
{
if((cpuY + (paddle2.offsetHeight / 2)) > (ballY + ball.offsetHeight)) cpuY -= CPUSpeed;
else cpuY += CPUSpeed;

paddle2.style.top = cpuY + 'px';
}
}


// TO MOVE PLAYER PADDLE ON MOUSE MOVE EVENT
function MovePaddle(e)
{
// Fetch y coordinate of mouse
var y = (e.clientY - (box.offsetTop - document.documentElement.scrollTop));
// Here, (box.offsetTop - document.documentElement.scrollTop) will get the relative
// position of "box" w.r.t to current scroll postion

// If y below lower boundary (cannot go above upper boundary -
// mousemove event only generated when mouse is inside box
if(y > (box.offsetHeight - paddle1.offsetHeight))
y = (box.offsetHeight - paddle1.offsetHeight);

// Copy position
playerY = y;
// Set position

paddle1.style.top = y + 'px';
}
</script>
</head>

<body bgcolor="#fff">
<h1 align="center">Pong Game Example in JavaScript</h1>

<div id="box">
<img class="ob" id="paddle1" src="paddle.PNG" onclick="javascript: Start()"/>

<img class="ob" id="paddle2" src="paddle.PNG" />
<img class="ob" id="ball" src="ball_small.PNG" />

</div>
<div id="msg" align="center"></div>
</body>
</html>

Related Posts:


Advanced features of C++ functions

There are 3 advanced features of C++ functions as compared to C. They are Call by Reference, Function Overloading and Default Arguments. You can read more about them here.

A simple program showing all the three features as follows:


//Program tested on Microsoft Visual Studio 2008 - Zahid Ghadialy
//Example of pointer to const and const pointer
#include<iostream>

using namespace
std;

//Call by reference
void swap(int& a, int &b)
{

int
temp = a;
a = b;
b = temp;
}


//Overloaded function: Call by reference (pointers)
void swap(int *a, int *b)
{

int
temp = *a;
*
a = *b;
*
b = temp;
}


//Pass by value with Default arguments
void doSwap(int a, int b = 1)
{

swap(a,b);
cout<<"After Local Swap: a = "<< a <<" b = "<< b <<endl;
}


int
main()
{

int
a = 10, b = 17;
cout<<"Before Swap : a = "<< a <<" b = "<< b <<endl;
swap(a, b);
cout<<"After Swap 1: a = "<< a <<" b = "<< b <<endl;
swap(&a, &b);
cout<<"After Swap 2: a = "<< a <<" b = "<< b <<endl;
doSwap(a, b);
doSwap(a);
cout<<"After DoSwap: a = "<< a <<" b = "<< b <<endl;

return
0;
}


The output is as follows:


Levity and Programming

BASIC is the perfect programming language to a lighthearted programming challenge, and I'm about to prove it to you. What better matchup between BASIC than Paper, Rock, Scissors?

Check it out. It's great to see people programming just for fun.

Programming tools in BASIC

Alyce Watson has updated her CodeAChrome widget, which is a syntax coloring editor specially made for editing BASIC source code. It's small, simple to use, and free! Check out her announcement here.

Math Concepts for kids and teens

Summarizing some key math concepts that I teach my kids.

Fundamentals
  • A correct value system is the most important foundation (the goal to excel, the willingness to help)
  • How to make decisions ? (differentiate emotional decision and strategic decision)
  • How to do planning ?
  • How to do reasoning, analyzing and drawing conclusion ?
  • How to be open minded, humble but not blindly follow conventional wisdom ? (why human walk with 2 legs, why do we have supermarkets, how do we decide where to put a bus station, why an apple is more expensive than an orange)
  • How to be patient and control emotions ?
  • Develop a good sense of numbers and able to read different charts and graphs, observing relationship between variables and their trends.
  • Appreciation of doing things in a smart way

Basic Math Concepts
  • Numbers, counting (Integer) and quantities (Real)
  • Cause and effect
  • Set (belongs, union, intersect, subset)
  • Function (dependent and independent variable, continuous vs discrete). Various graphing (histogram, line graph, plot), 2D curve and 3D plane
  • Linear equations, degree of freedoms, relationship between number of variables and number of equations.
  • Calculus (differentiation and integration), multi-variables and partial differentiation
  • Logic (if/then, necessary/sufficient conditions, equivalence) and Proof establishments
  • Debate and Logic fallacies
  • Geometry and Vector (think 3D instead of 2D)
  • Probabilities (Draw a tree of all outcomes and counting)
  • Probability distribution function and expected gains
  • Permutations and Combinations (how to find out "all possibilities")
  • Mathematical induction, recursion in proofs.
  • Digits with different bases (and their relationship with Polynomials)
  • Making predictions: False positives, False negatives and how trade-off decisions should be made

Math Models
  • Decision tree (decision and outcome alternations, min/max strategy). Expected gain and optimization
  • Game theory (Nash equilibrium). Outcome prediction within a social group. Win/win and win/lose and lose/lose situations.
  • Finding solution using Search tree, exhaustive search in all possibilities in a systematic way (tree traversal, breath-first vs depth-first vs heuristic)
  • Linear programming for constraint satisfaction and optimization
  • Deterministic vs Stochastic process (Markov chains), Queuing theory
  • Control system (equilibrium, stability and feedback loop)
  • Graph model (nodes and arcs, path finding, shortest path, minimal spanning tree)
  • Finite State Machines (everything happens in a cycle)

Using Wide Charachters in C++

The normal 'char' is 8 bits. There is a 'wide char' (wchar_t) that is generally 16 bits. The width of wchar_t is compiler specific and can be as small as 8 bits. It is therefore recommended that it should not be used for creating portable programs.

A simple example as follows:


//Program tested on Microsoft Visual Studio 2008 - Zahid Ghadialy
//Simple example of printing and comparing wide charachters
#include<iostream>

using namespace
std;

int
main()
{

wchar_t
wide_charachter;
wide_charachter = L'c';
//using wcout for printing
wcout<<"Wide Output of wide_charachter = "<<wide_charachter<<endl;

wstring wide_string; //wide string
wide_string = L"A wide string";
wcout<<"Wide Output of wide_string = "<<wide_string.c_str()<<endl;

wstring new_wide_string(L"Another wide string");

//comparing strings
if(wcscmp(new_wide_string.c_str(),wide_string.c_str())== 0)
cout<<"new_wide_string == wide_string"<<endl;
else

cout<<"new_wide_string != wide_string"<<endl;

if
(wcscmp(new_wide_string.c_str(),L"Another wide string")== 0)
cout<<"new_wide_string == L\"Another wide string\""<<endl;

return
0;
}


The output is as follows:

Getting Date and Time in C++ on Windows

The program example below shows three aproaches to get the date and time. MSDN references are embedded in the program.


#include<iostream>
#include<time.h> //For approach1 and approach3
#include <Windows.h> //For approach 2

using namespace
std;

void
approach1(void)
{

char
dateStr [9];
char
timeStr [9];
//http://msdn.microsoft.com/en-us/library/585kfedd(VS.80).aspx
_strdate_s( dateStr);
//http://msdn.microsoft.com/en-us/library/yb2bth04(VS.80).aspx
_strtime_s( timeStr );
cout<<"\nApproach 1"<<endl;
cout<<"Current date is: "<<dateStr<<endl;
cout<<"Current time is: "<<timeStr<<endl;
}


void
approach2(void)
{

SYSTEMTIME systemTime;
//http://msdn.microsoft.com/en-us/library/ms724390(VS.85).aspx
GetSystemTime(&systemTime);
cout<<"\nApproach 2"<<endl;
cout<<"Current date is: "<<systemTime.wMonth<<"/"<<systemTime.wDay<<"/"<<systemTime.wYear<<endl;
cout<<"Current time is: "<<systemTime.wHour<<":"<<systemTime.wMinute<<":"<<systemTime.wSecond<<endl;
}


void
approach3(void)
{

//http://www.daniweb.com/forums/thread64803.html
char buffer[BUFSIZ] = { '\0' } ;
time_t now = time( &now ) ;
struct
tm local_time;
//http://msdn.microsoft.com/en-us/library/a442x3ye(VS.80).aspx
localtime_s( &local_time, &now ) ;
cout<<"\nApproach 3"<<endl;
//http://msdn.microsoft.com/en-us/library/fe06s4ak(VS.71).aspx
strftime( buffer, BUFSIZ, "%m/%d/%Y", &local_time ) ;
cout<<"Current date is: "<< buffer << endl ;
strftime( buffer, BUFSIZ, "%H:%M:%S", &local_time ) ;
cout<<"Current time is: "<< buffer << endl ;
}


int
main()
{

approach1();
approach2();
approach3();
return
0;
}


The output is as follows:

Moving (Positioning) an Image Using JavaScript

Screenshot


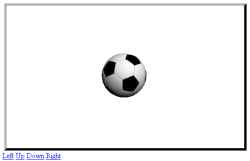
In this post we’re going to learn how we can move an image around using JavaScript. We’ll have four control links (Left, Right, Up, Down) that’ll move the image.


Reading along you’ll learn:


  1. What the absolute and relative positions do

  2. How some JavaScript function can be invoked automatically on page load

  3. How JavaScript can be used to manipulate the “style” properties of elements

  4. How JavaScript can be used to change these properties


Okay, now let’s start!


THEORY


We’re going to have the following elements in the page:


  1. A container (div)

  2. An image

  3. Control links


Container


The container would be styled to have a size of 500px by 300px. It’d have position: relative which makes anything inside to be positioned with respect to this container. It’s done to make the image move independent of the placement of the container. We’ll also make the overflows from the container to be “hidden”.


Image


The image would be given position: absolute which means it can be positioned with absolute (left (x), top (y)) values. Normally images (like other elements) are positioned, aligned, wrapped accordingly with other elements. The absolute position however, gives us the power to place the image (or other element) freely.


Control Links


Control Links  will be used to invoke the functions to move the image in the respective directions.


Misc.


The functions being called by the Control links will manipulate the position of the image using one document.getElementbyId() function.


This function is used to reference elements in the document uniquely by using their IDs (which are supposed to be unique for each element). The style properties of elements are referenced as:


document.getElementById(<ID>).style.<STYLE-NAME>


We’ll be using the onload event of the body element to invoke the Init() function initially on page load.


<body onload="javascript:Init()">


WORKING


When the page loads, the function Init() is getting called which sets the initial position of the image.


When a control link is clicked, the respective coordinate (x or y) is modified and the new value is set in the following line:


document.getElementById('img1').style.left = x + 'px';


document.getElementById('img1').style.top = y + 'px';


CODE


<!DOCTYPE html PUBLIC "-//W3C//DTD XHTML 1.0 Transitional//EN" "http://www.w3.org/TR/xhtml1/DTD/xhtml1-transitional.dtd">
<html xmlns="http://www.w3.org/1999/xhtml">
<head>
<meta http-equiv="Content-Type" content="text/html; charset=utf-8" />
<title>JavaScript: Moving an Image</title>
<script type="application/ecmascript">

// --CHANGE THESE IF REQUIRED--
// Initial x-position of image
var x = 200;
// Initial y-position of image
var y =100;
// Pixels to move in each step
var inc = 10;

function Init()
{
document.getElementById('img1').style.left = x + 'px';
document.getElementById('img1').style.top = y + 'px';
}
function moveRight()
{
x += inc;

document.getElementById('img1').style.left = x + 'px';
}

function moveLeft()
{
x -= inc;

document.getElementById('img1').style.left = x + 'px';
}

function moveUp()
{
y -= inc;

document.getElementById('img1').style.top = y + 'px';
}

function moveDown()
{
y += inc;

document.getElementById('img1').style.top = y + 'px';
}
</script>


<style>
#box
{
width: 500px;
height: 300px;
position: relative;
margin: 20px auto 0px auto;
border: 5px outset #000;
overflow: hidden;
}

.image
{
position: absolute;
z-index: 100;
}
</style>
</head>

<body onload="javascript:Init()">
<div id="box"><img class="image" id="img1" src="ball.png"/></div>
<a href="javascript:moveLeft()">Left</a>
<a href="javascript:moveUp()">Up</a>
<a href="javascript:moveDown()">Down</a>
<a href="javascript:moveRight()">Right</a>
</body>
</html
>

NOTE: An image with name "ball.png" must be there in the same directory as this file for the above ocde to work "as-is".


Related Posts:


Changing objects in 'const member functions' via Mutable

We saw last time an example of 'Const Member Functions' (also known as 'Inspectors'). In contrast the member functions without the const suffix are known as 'non-const member functions' or 'mutators'.

Sometimes it may be necessary to modify a data member (variable or object in your class) in a const member function. There are two approaches to do that. One is to use the const_cast and the other to use 'mutable'. I use both the approaches in the example below:


//Program tested on Microsoft Visual Studio 2008 - Zahid Ghadialy
//This example shows how to change objects in const member functions
#include<iostream>

using namespace
std;

class
ABC
{

public
:
int
func1(int a, int b);
int
func2(int a, int b) const;
private
:
int
x;
mutable
int y;
};


int
ABC::func1(int a, int b)
{

x = a, y = b;
cout<<"x = "<<x<<" and y = "<<y<<endl;
return
0;
}


int
ABC::func2(int a, int b) const
{

//x = a; - COMPILE ERROR because its const
int *temp = const_cast<int*>(&x); //Removing the const
*temp = a; //OK now
y = b; //OK because its defined as mutable
cout<<"x = "<<x<<" and y = "<<y<<endl;
return
0;
}


int
main()
{

ABC abc;
abc.func1(3, 7);
abc.func2(20, 40);
return
0;
}


The output is as follows:


Difference Between a++ and ++a

The difference between a++ and ++a, is that when we use a++ in a program and then the effect would be on the next statement while the ++a, effect is that on the current line not on the next statement.
Output:

Example code:

Select To use this code as it is.. select and copy paste this code into code.cpp file :)


  1. #include<iostream.h>
  2. #include<conio.h>
  3. void main()
  4. {
  5. clrscr();
  6. int a,b;
  7. a=1;
  8. cout<<a<<endl;
  9. cout<<a++<<endl;
  10. cout<<a<<endl<<endl;
  11. b=5;
  12. cout<<b<<endl;
  13. cout<<++b<<endl;
  14. cout<<b<<endl;
  15. getch();
  16. }

Earth shaking!

Here's a neat example of BASIC programming which plots earthquake data graphically.  What's cool about this is that it demonstrates graphics, interfacing with VBScript, and getting information off the Internet.  Add to this that it's not a large program.


Who says you can't do that in BASIC?

Over at the Liberty BASIC forum on Conforums they've announced a programmer of the month for September.  Chung, a prolific Liberty BASIC programmer has created an OpenGL flight simulator in Liberty BASIC.   Very, very nice!

  Click to read the announcement and make sure to follow the link to Chung's site to see the flight simulator!


Check out this stream