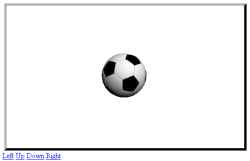
In this post we’re going to learn how we can move an image around using JavaScript. We’ll have four control links (Left, Right, Up, Down) that’ll move the image.
Reading along you’ll learn:
- What the
absoluteandrelativepositions do - How some JavaScript function can be invoked automatically on page load
- How JavaScript can be used to manipulate the “style” properties of elements
- How JavaScript can be used to change these properties
Okay, now let’s start!
THEORY
We’re going to have the following elements in the page:
- A container (
div) - An image
- Control links
Container
The container would be styled to have a size of 500px by 300px. It’d have position: relative which makes anything inside to be positioned with respect to this container. It’s done to make the image move independent of the placement of the container. We’ll also make the overflows from the container to be “hidden”.
Image
The image would be given position: absolute which means it can be positioned with absolute (left (x), top (y)) values. Normally images (like other elements) are positioned, aligned, wrapped accordingly with other elements. The absolute position however, gives us the power to place the image (or other element) freely.
Control Links
Control Links will be used to invoke the functions to move the image in the respective directions.
Misc.
The functions being called by the Control links will manipulate the position of the image using one document.getElementbyId() function.
This function is used to reference elements in the document uniquely by using their IDs (which are supposed to be unique for each element). The style properties of elements are referenced as:
document.getElementById(<ID>).style.<STYLE-NAME>
We’ll be using the onload event of the body element to invoke the Init() function initially on page load.
<body onload="javascript:Init()">
WORKING
When the page loads, the function Init() is getting called which sets the initial position of the image.
When a control link is clicked, the respective coordinate (x or y) is modified and the new value is set in the following line:
document.getElementById('img1').style.left = x + 'px';
document.getElementById('img1').style.top = y + 'px';
CODE
<!DOCTYPE html PUBLIC "-//W3C//DTD XHTML 1.0 Transitional//EN" "http://www.w3.org/TR/xhtml1/DTD/xhtml1-transitional.dtd">
<html xmlns="http://www.w3.org/1999/xhtml">
<head>
<meta http-equiv="Content-Type" content="text/html; charset=utf-8" />
<title>JavaScript: Moving an Image</title>
<script type="application/ecmascript">

// --CHANGE THESE IF REQUIRED--
// Initial x-position of image
var x = 200;
// Initial y-position of image
var y =100;
// Pixels to move in each step
var inc = 10;

function Init()
{
   document.getElementById('img1').style.left = x + 'px';
   document.getElementById('img1').style.top = y + 'px';
}
function moveRight()
{
   x += inc;

   document.getElementById('img1').style.left = x + 'px';
}

function moveLeft()
{
   x -= inc;

   document.getElementById('img1').style.left = x + 'px';
}

function moveUp()
{
   y -= inc;

   document.getElementById('img1').style.top = y + 'px';
}

function moveDown()
{
   y += inc;

   document.getElementById('img1').style.top = y + 'px';
}
</script>


<style>
#box
{
   width: 500px;
   height: 300px;
   position: relative;
   margin: 20px auto 0px auto;
   border: 5px outset #000;
   overflow: hidden;
}

.image
{
   position: absolute;
   z-index: 100;
}
</style>
</head>

<body onload="javascript:Init()">
<div id="box"><img class="image" id="img1" src="ball.png"/></div>
<a href="javascript:moveLeft()">Left</a>
<a href="javascript:moveUp()">Up</a>
<a href="javascript:moveDown()">Down</a>
<a href="javascript:moveRight()">Right</a>
</body>
</html>
NOTE: An image with name "ball.png" must be there in the same directory as this file for the above ocde to work "as-is".
Related Posts: